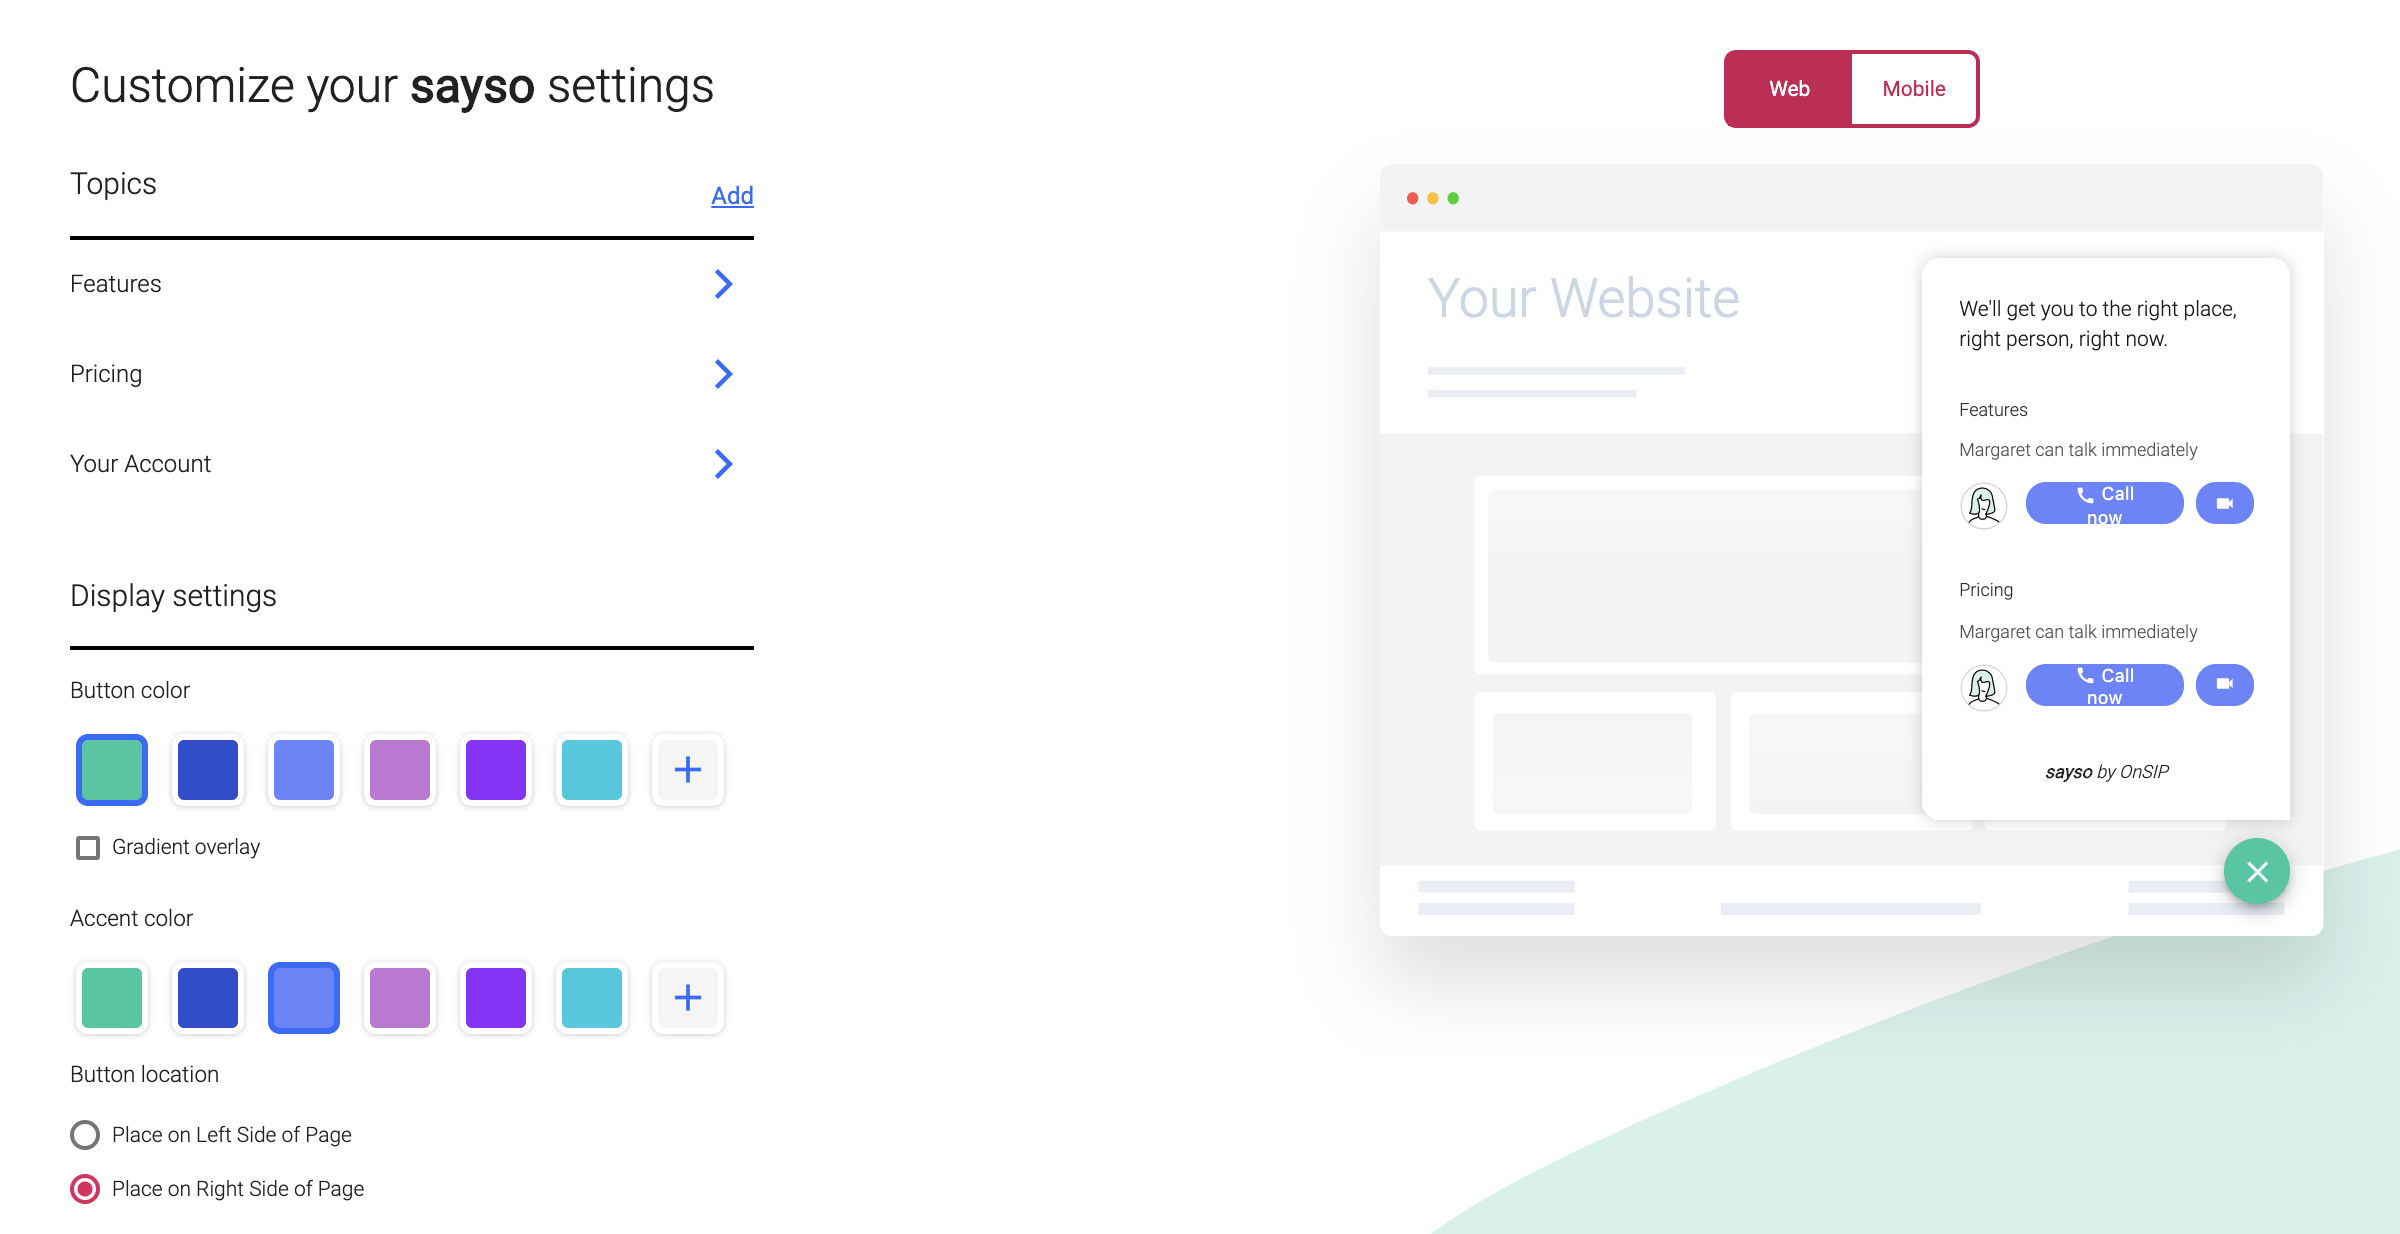
One of the deciding factors behind sayso’s development was an intuitive user interface. Previous iterations of our click to call technologies required a fair amount of web design know-how. So we built sayso to be as simple as possible for the end user.
For configuration, all you have to do is copy and paste one little code snippet to your website and you’re up and running. Don’t worry if that sounds more complicated than you’d like—we made sure to test our step-by-step instructions on OnSIP folks who are decidedly NOT developers (read: your blog writer), and it was a rousing success.
Now that you have sayso installed on your website, what’s next? Time to customize!

Appearance
Button Color
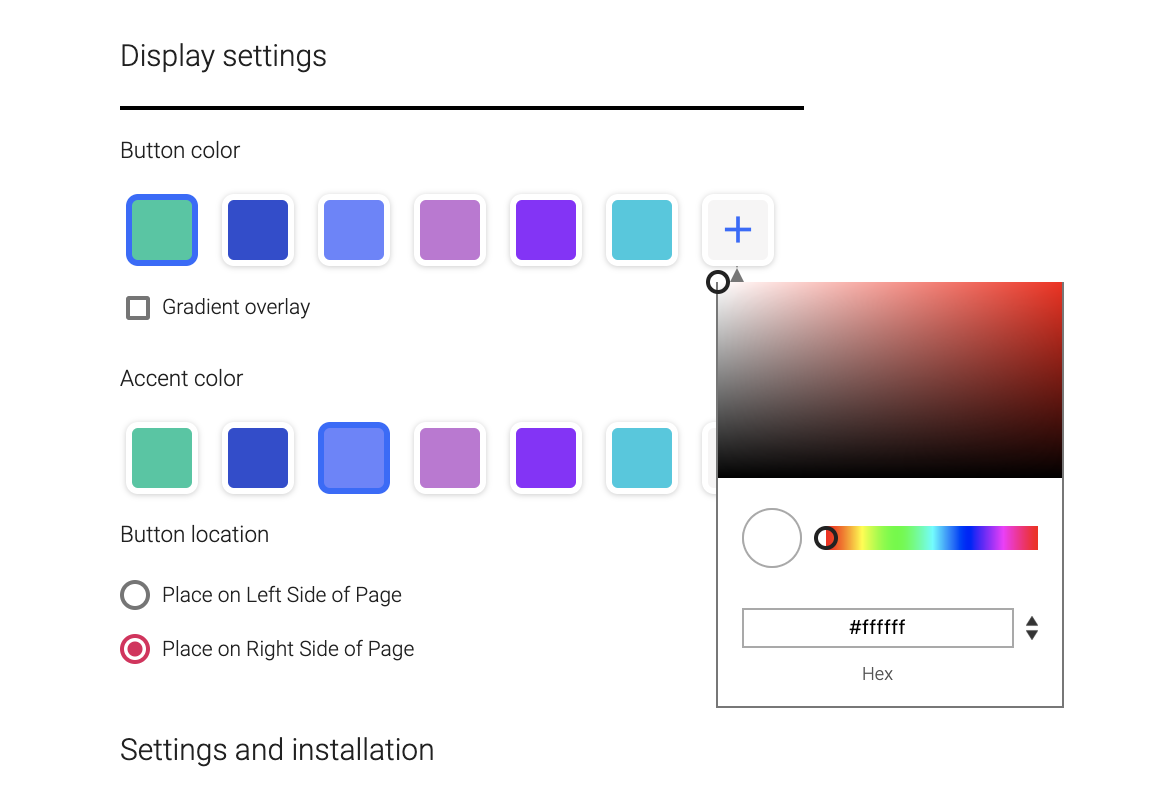
This is the color that appears at all times: the standalone sayso button with the phone icon, or the “X” that replaces the phone when you expand the sayso window. Typically this would be your main brand color (so long as it doesn’t clash with your website!). You can also choose to have a gradient overlay rather than a flat color if you check the box underneath the color options. We have six default swatches, and you can add in your own hex codes when you click the “+” button at the end of the row.

Accent Color
This is the color of the “Call Now” voice and video buttons next to available reps in the sayso window. Typically this is your secondary brand color. Unlike the button, accent colors cannot have a gradient overlay. Like the button, however, you can add your own hex codes by clicking the “+” button at the end of the swatches.
Button Location
You can choose whether sayso lives on the right or left side of your website—particularly useful for those companies that use both voice and text live chat!
Topics
You can add new topics from the main sayso settings page. To edit, clone, or review existing topics, click on the topic name from the list on the main settings page.
Clicking on an existing topic brings you to an overview of its specific settings (left) and editing options (right).
By default, all topic settings are checked off. To edit these settings, simply uncheck the box. Video calls are a simple check/uncheck, but the other settings have further details once unchecked.
Available Countries
- Option 1: All countries will see and be able to use the sayso button on your website (default).
- Option 2: You can uncheck the box and create a whitelist of countries that are able to see your sayso button.
Business Hour Rules and Holidays
Naturally, you don’t want people making sayso calls when no one’s around to answer. The default sayso setting has the button up 24/7. Once you uncheck it, you can create your own BHRs. The default selection here is 9–5 weekdays, the typical office week. Go ahead and shift these to match your business.
You can also plug in any holidays when your office is closed, and those dates will bypass the regular BHRs.
Page Display
Want sayso on every page your website has? Great! Leave this section checked off. Only want it on specific pages, or specifically NOT on certain pages? Enter page display rules. You decide where sayso shows up (and which topics appear on which pages, up in the topics section).
Learn more about OnSIP's sayso pricing plans.