Summary
| Overall: |      |
| Configuration: |      |
| OnSIP Testing: |      |
| Voice Quality: |      |
| Ease of Use: |      |
Quick Specs
- G722, Speex, G711, GSM and iLBC codecs
- Instant Messaging (MSRP chatroom support)
- File Transfers (MSRP file transfer support)
- Screen Sharing (private SylkServer extension)
Pros
- Packed with features - Chat sessions, IM, file and desktop sharing
- Built-in SIP account integration, account management interface
- Clean Interface allows for intuitive call handling
Cons
- Many features can only be used with a SIP account from AG Projects
- No transfer
- Unreliable DTMF, no numpad
- MAC only

The following review was conducted in June 2011, and information on subsequent software updates and new version releases may not be reflected within. This review predates OnSIP’s mobile app for iOS and Android, free to OnSIP users, so is not affected by bias.
A more recent review of this phone can be found here: Blink Pro (v1.3.0).
AG Projects self-describes as a “company supplying service providers with turnkey SIP infrastructure systems.” The developer has implemented and supported ready-to-use SIP service related projects for cable operators and ISPs since 2002. The Blink Pro SIP client/softphone app is the user endpoint of their product portfolio.
First Impressions of the Blink Softphone
Although you can register Blink Pro with your pre-existing SIP provider, it works most seamlessly with a SIP2SIP.info account, AG Project’s own free SIP account service (or an account from one of their customers).
With that in mind, certain sections of this review will be split into two sections. We will cover what you can do with your pre-existing provider and talk extensively about the features unlocked when you register with an account from SIP2SIP.info.
Some of the more interesting features include “Chat Sessions,” a combination of an HD conference room and an IM chatroom, file transfer, and desktop share. Overall, Blink Pro is very user-friendly, and the native integration with SIP2SIP.info makes getting started for SIP newbies quick and painless.
App Configuration
The registration process on Blink Pro is no different than it is on Blink Lite.
Blink Pro is currently available for the Mac OSX and can be purchased through the Mac App Store for $49.99.
When you open up the application for the first time, you should see a menu that asks you to add a SIP account. You can either add an existing account or choose to create a new @sip2sip.info account. To provision your OnSIP account, select “Add an existing account.” You’ll notice that the only two other fields on this menu are SIP address and password.
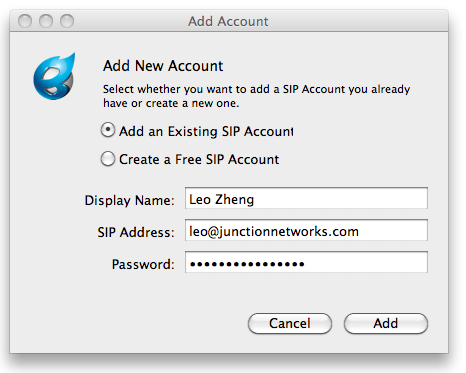
Log in to your OnSIP admin portal to retrieve your SIP credentials. You can find this information in the user detail pages under the Users tab in the Phone Configuration section.

Enter in the values as follows:
- Display Name > Your Choice
- SIP Address > Address of Record
- Password > SIP Password
Press “Add.”
Next, go into Blink Preferences and click “Accounts” at the top of the screen. Your account should be listed here on the left with a red circle, indicating that you are not yet registered. On the right, you should see a drop-down menu labeled “Advanced.” Click it and select “Authentication.” Enter your Auth Username in the field provided. The red circle should turn green. Next, click on the “Advanced” drop-down menu again and select “SIP Signaling.” Enter “sip.onsip.com” into the field labeled “Outbound Proxy.”
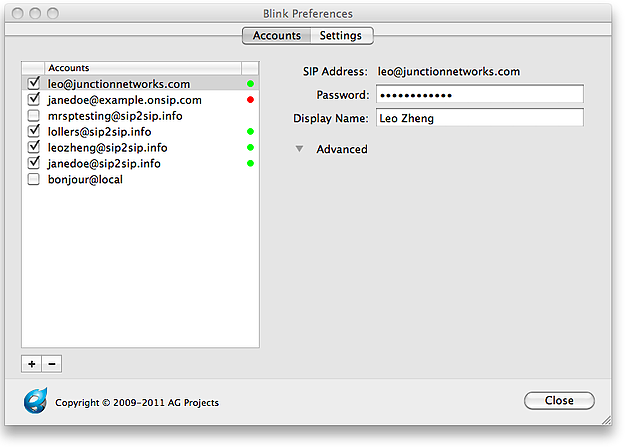
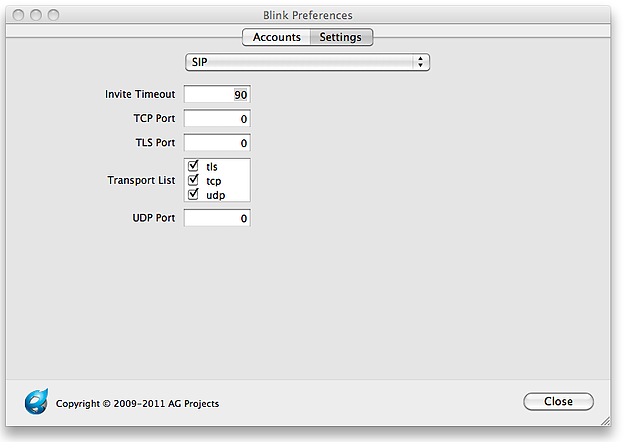
To modify your voice codecs, select “RTP” from the “Advanced” dropdown menu. Alternatively, you can choose “Advanced” from the menu at the top of the Blink Pro Preferences menu. The options listed at the top of the “Advanced” page has more properties you can modify. Select “SIP Signaling” from the drop-down menu and make sure that “UDP” is selected under “protocols.”
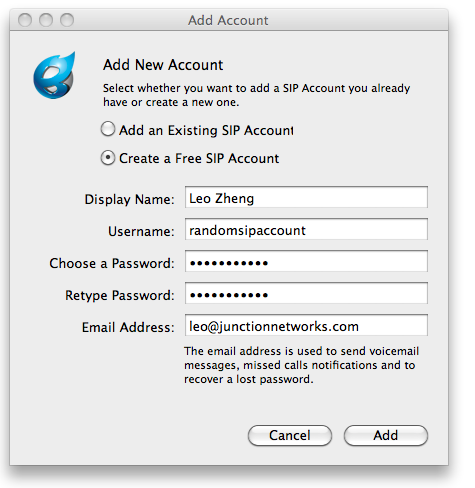
To register a new SIP2SIP.info SIP account on Blink Pro, select “Create a Free SIP account” at the “Add Account” menu. Fill out the fields and click the “Add” button to register Blink Pro with your new SIP account. That’s all there is to it.
Unlike Blink Lite, Blink Pro allows you to save and register multiple SIP accounts on the client at a time.
Compatibility Testing
At Junction Networks, we put each of the phones we use through a multi-step interoperability test in which we apply ~30 test cases. Here’s an example of a test case:
Test phone calls phone B
B picks up
B puts test phone on hold
B calls phone C
C picks up
B transfers test phone to C
The call must be transferred correctly to C. B must be released correctly after the transfer. When C picks up, audio must work both ways between test phone and C. When the test phone is on hold, there is no audio between it and phone B.
We evaluate things from a business user’s perspective, where call-handling options such as call transfer are critical. Blink Pro supports neither blind nor attended transfer as far as we can tell. You can drag and drop your contacts into an ongoing call, but this creates a conference call, and there’s no way to remove yourself from the session and keep the conversation going between the other two participants.
We were also unable to successfully send DTMF tones using Blink Pro. According to the help section on icanblink.com, you can focus calls and anything you press on the keyboard afterward will automatically be translated into DTMF tones:
DTMF
Dial tones are used to interact with PBX and IVR systems or legacy PSTN gateways. To send DTMF tones, focus the Audio Call by clicking on it. The current call is already focused if you just started it. What you then type on the keyboard is automatically translated into DTMF tones. Alphanumeric keys are translated into numeric DTMF keys as they are on a numeric telephone keypad.
This did not work for us, even when we were using the PCMU codec with “Inband DTMF” enabled. There was no indication that the application was recognizing any of our keyboard inputs during a call. We found several reports of users who were able to get it to work after multiple attempts. Either way, Blink Pro currently does not interact with auto-attendants reliably, which is problematic for our business users. All of our employees are behind an auto-attendant. The developers informed us that a dialpad will be included in the next update.
Voice Quality
Call quality on Blink Pro is no different than it is on Blink Lite. This varies from good to excellent, depending on whether the other participants in the call are using wideband-compatible phones/SIP clients. Blink Pro supports the same audio codecs as the Lite version: G.722, PCMA/PCMU, Speex, iLBC, and GSM.
Ease of Use
Blink Pro and Blink Lite share the same user interface elements.
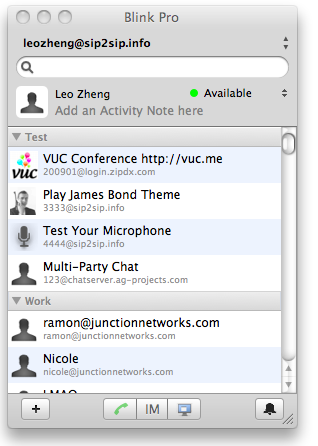
At the top is a drop-down menu that shows the currently active dial-out SIP account. Use this to easily switch between dial-out accounts. In the drop down-menu, a SIP account in bold indicates that the account is registered and receiving incoming calls. A SIP account in gray indicates that there is a registration error. Users can add SIP accounts straight from this account-select drop-down menu. Next comes the input field for dialing numbers and SIP URIs. This doubles as a contacts search field.
Next are the personal presence settings. Users can set their icons and presence statuses here.
Underneath the personal settings is the standard contacts list. Adding contacts is easy. Click on the “add contact” button (+) in the bottom left-hand corner and a dedicated “Add Contact” window pops up. You can choose the group you want your new contact to belong to and specify your preferred method of communication: audio or chat.
At the bottom are three icons: a phone to dial, the letters “IM” to initiate conferences and chats, and a monitor to initiate desktop sharing.
Call Handling
When you initiate a call, a tab pops out of the side of your UI called “Audio Sessions.” Each call is represented by a box that includes the standard call handling options: “hold,” “record,” and “hang up.” At the bottom of your “Audio Sessions” tab are a few more options. These are “Hangup All,” which ends all of your calls, “Conference,” which throws all of your ongoing calls into a conference, and “Mute.”
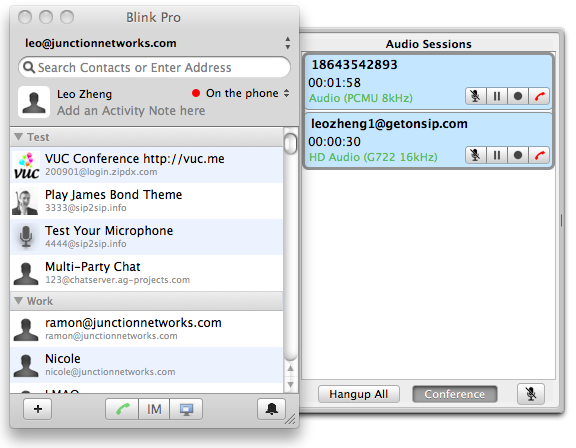
Blink allows you to conduct simultaneous calls. There’s no specified limit, but we were able to juggle three plus calls without any problems. When you want to add a call, simply clear out the input field in your UI, enter in a new SIP address or number, and hit dial. Your current call/calls will automatically be put on hold.
What’s fantastic about the “Audio Sessions” tab is how easy it is to initiate conferences. The boxes that represent your calls can be dragged and dropped into each other to seamlessly create a conference session. Want to remove someone from the conference? Simply drag their box out. We’re fairly certain this drag-and-drop call and conferencing management UI isn’t unique to Blink but can’t remember the last time we’ve seen it executed so well.
History Records
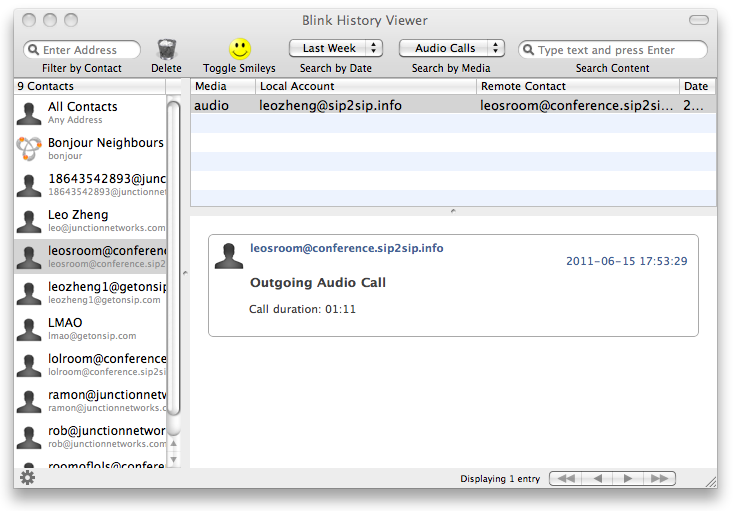
Blink Pro keeps track of pretty much everything you do with the application. You can view your missed, incoming/outgoing, and conference calls by simply selecting the “History” option from the top navigation menu. The application also comes with a History viewer, which is a separate window that allows users to sort through their histories by contact, date, and media type. There’s a search window in the history viewer so that you can look up previous communications “sessions” armed only with specific segments of a conversation you remember.
IM
Blink Pro handles IM in two ways: SIP and MSRP.
 SIP
SIP
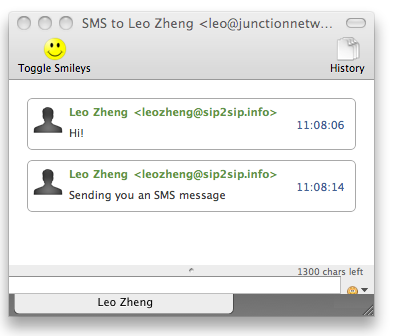
IM with SIP should work with users’ preexisting SIP providers. This is commonly referred to as “Short Messages,” or SMS. When users send an IM using SIP, the recipient gets that message on all the SIP user agents registered to her SIP account, including softphones, mobile clients, and even desk phones, which may or may not have the ability to display the messages. It isn’t a particularly elegant way of handling IM, but it has the benefit of being more or less device and provider “agnostic.”
To start an IM session using SIP, simply right-click on a contact and select “Send SMS” or “Start Chat Session.” You can also select a contact and choose “Send SMS”/”Start Chat Session” when you hit the “IM” button at the bottom of your client.
MSRP
The second way to do IM on Blink Pro, “Chat Sessions,” uses Message Session Relay Protocol (MSRP). Chat sessions will work if and only if all participants are using Blink (or another SIP client that supports MSRP; we were unable to find one) and a SIP provider with the infrastructure to support it. “Chat Sessions” is not device and provider “agnostic” (OnSIP accounts did not work), but it is also a much more graceful way of doing IM. We were able to play around with the feature with AG Projects’s own SIP2SIP.info accounts.
IM Chat Sessions
Probably the most interesting feature in Blink Pro is “Chat Sessions.” If you and your colleagues are using SIP2SIP.info accounts, there are a number of ways to start one. You can either a) right-click on a contact and select “Start Chat Session,” b) select a contact and select “Start Chat Session” from the “IM” button at the bottom of your SIP client, or c) select “Call” from the top nav, choose “Join Conference,” create a conference room, and invite participants.
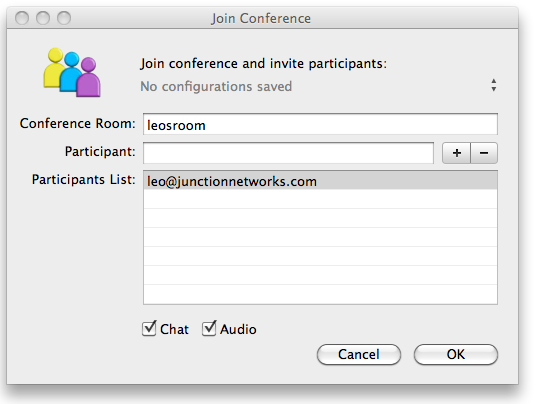
Note that if you select method C, you can choose any name you want for the conference room—it will be in the form roomname@conference.sip2sip.info. A free ad hoc HD conference room is created each time you start a new “chat session.” Users can dial in to this address to enter the conference from any SIP device, and the conference room can even dial out to people you want to invite to the session.
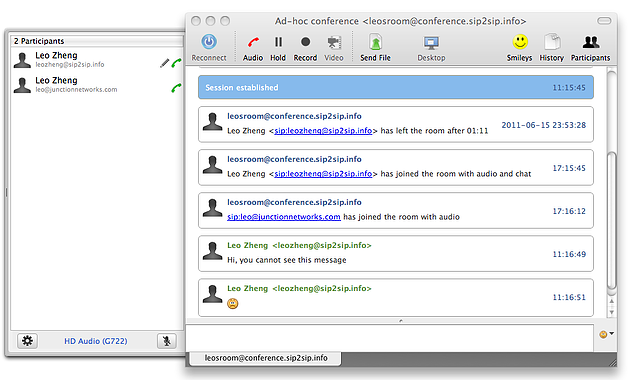
Conference participants are listed in a tab on the left. The pencil and phone icons indicate how each person is participating in the conversation. People who are not using Blink and a SIP2SIP.info account will not be able to view the chat session window, which means they cannot participate in IM, file sharing, etc. Users can participate in multiple chat sessions simultaneously and switch between them by clicking on the tabs representing each session at the bottom of the window. Note that it is very unlikely that you will be able to start a chat session using methods A and B with someone who is not using a SIP2SIP.info account on Blink. You can, however, start a conference room and add his SIP address or phone number to the participant list. In this latter scenario, the conference room dials out to invite them in. You can also drag and drop any of your contacts into the participants tab to easily invite them to join the session after it has been established.
The IM chat room functions much like you would expect it to. The chat room makes a note each time someone enters and leaves the conversation and will also record other specific actions, such as when a user shares a file with the conference. The “audio” button at the top of the window is used to toggle the audio portion of the chat session. The other buttons are pretty self-explanatory; you can record the entire session, put it on hold, send files, and view the entire history of the room. We did not try to use the desktop sharing button within the chat session, so we’re not quite sure how that will work, especially if there are many people in the conference.
File Sharing and Desktop Sharing
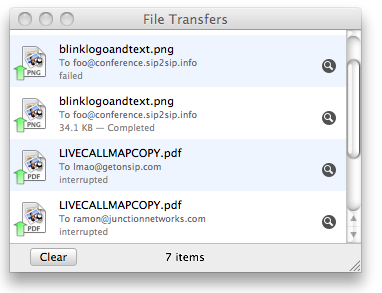
The file sharing and desktop sharing features in the application appear to also be provider agnostic. To share a file, simply right-click on a contact and select “Send File(s).” Users can also drag and drop files onto their contacts. After a file is selected, a “File Transfers” menu will appear that shows the progress of the transfer. Provided that the intended recipients are also using SIP clients with file transfer functionality, there should not be any problems.
We were able to conduct a desktop sharing session between an OnSIP account and a SIP2SIP.info account without any issues. It is important to realize beforehand that the person you are sharing your desktop with can control your desktop. Also note that when you establish a desktop sharing session, you also inadvertently establish an audio connection with that person. This is not entirely unlike desktop sharing in Skype. The overall quality of this experience depends heavily on the strength of your Internet connection.
Call Recording
Blink Pro allows users to record conversations, whether it’s a two-person call or a five-person conference call. Audio recordings are saved to a history folder and organized by SIP account. Users can quickly access recordings by selecting History from the top navigation menu and scrolling over “Audio Recordings.” The recordings are arranged here in reverse chronological order. Select a recording, and it will automatically play in iTunes.
SIP2SIP.info + Blink Pro
Now let's go over what you can do with Blink Pro when you’re using a SIP account from AG Projects. As we already established, perhaps the easiest way to get started on Blink Pro is to just create a new SIP2SIP.info account; it not only automatically registers this SIP client for you, but it also unlocks several other features.
Important Note: We do not want to give you the false impression the developer built a closed system. According to AG Projects, their SIP infrastructure products—and this includes Blink—are strictly built on IETF standards. All the VoIP, IM, Chat, File Transfer, and Conferencing features were implemented based on their corresponding IETF standards.
For example, the chat drawer that displays the conference information is RFC4575, file transfer is RFC5547, and the chat room is draft-ietf-simple-chat-09.
A valid question you might be asking right now is, “Well, if this is true, then why can't my SIP service use the Chat Sessions feature? Why can't OnSIP?” The short and simple answer is that service providers and phone manufacturers/app developers pick and choose what to implement. There is usually more than enough common ground for interoperability, but every once in a while you come across something that is more or less unique to one service.
Tools
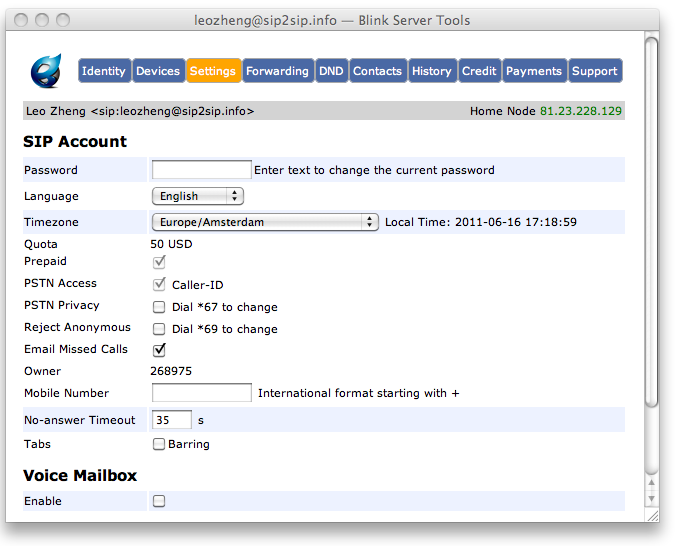
When you’re using a SIP2SIP.info account, you can access your SIP account settings straight from the application. Simply click on “Tools” in the top nav. There’s a lot of customizing you can do in the “Blink Server Tools” window that pops up, but this has more to do with the SIP2SIP.info service and less to do with the Blink Pro application. We will say that being able to toggle on voicemail, set DND rules, and add PSTN credit without ever leaving the application is very cool.


 SIP
SIP