Most VoIP platforms support IP phone booting - a feature that speeds up the phone registration process. IP phone booting is a widespread practice in the VoIP industry, but providers rarely advertise it as a standalone feature.
Since most IP phone booting instructions are full of technical jargon, we compiled a short FAQ to explain the basics of this often overlooked VoIP feature.
IP Phone Booting FAQ
What is IP phone booting?
IP phone booting is a process that automatically registers your phone with a VoIP service.
Why is it necessary?
A phone must be registered with a VoIP service before it can make phone calls. IP phone booting automates registration, allowing you to save time by bypassing manual configuration.
What information do I need?
You will need the phone's MAC address and IP address, along with your VoIP user credentials. A MAC address is a unique identifier assigned to a network device such as a phone, and it can usually be found on the bottom of the phone near the power adapter.
How is it done?
To register your phone, simply enter your phone information and VoIP credentials into an online admin portal using an Internet browser. Many VoIP providers offer Knowledgebase articles outlining exact steps for booting individual phones. The phone booting process differs for each phone brand.

What phones are supported?
Each VoIP service has their own boot server, so you will have to check with your provider to find out which IP phones they support. But most VoIP services support automatic booting for a number of phones. Mainstream brands, such as Polycom, Grandstream, and Panasonic, are often more likely to have boot support. Check out our phone reviews page for assessments of phones we've added to our boot server.
How long does it take to boot a phone properly?
In general, IP phone booting is very quick and should take no longer than 15 minutes.
Is there a limit to how many phones can be booted?
Each phone that you register will have to be booted and configured individually. The phones cannot be booted en masse. With most VoIP services, there's no limit to how many phones can be registered on your system, but each registered phone will cost you the full amount per seat per month.
However, certain providers with pay as you go pricing plans will not charge you just to register a phone. These services will make you pay for the minutes and the features you use, rather than for each individual seat.
What if a VoIP service does not allow my phone to be automatically booted?
This does not necessarily mean that the phone can't be used with the provider. Some services allow any RFC SIP compliant phone to be used on their platform. The catch here is that you'll have to manually configure the phone to get it working with the service.
IP Phone Booting Example: Grandstream
Booting an IP phone is fairly straightforward. You'll need your VoIP user credentials and your phone's MAC address. Here's an overview of how to provision a Grandstream phone using the OnSIP boot server.

Step 1: Reset your phone to its factory defaults
Click the menu button on your phone. In the onscreen menus, select Config > Factory Reset.
Step 2: Find the MAC Address of your phone and enter it into the OnSIP admin portal
You can find your phone's MAC Address printed underneath it. Enter it into the OnSIP admin portal and assign your phone a user.
Step 3: Add boot.onsip.com to your Grandstream phone
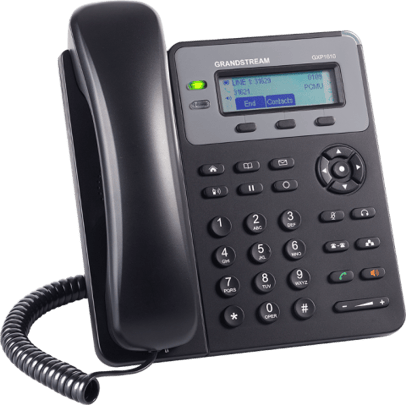
Find the IP address of your phone. In most cases, you should see your phone's IP address on your phone's home screen under Grandstream name. Enter that IP address into your web browser to log in to Grandstream's web-based device configuration tool. The default admin username and password is simply 'admin'.
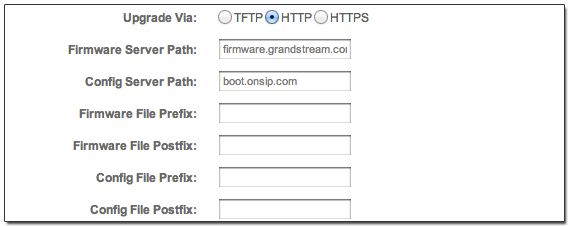
Click on Settings > Advanced Settings and scroll down on the page until you see "Upgrade via". Make sure that "http" is checked.

Below that, you should see the field labeled "Config server path". Enter "boot.onsip.com" in this field. Finish it off by scrolling down on the page and clicking the Update button at the bottom.
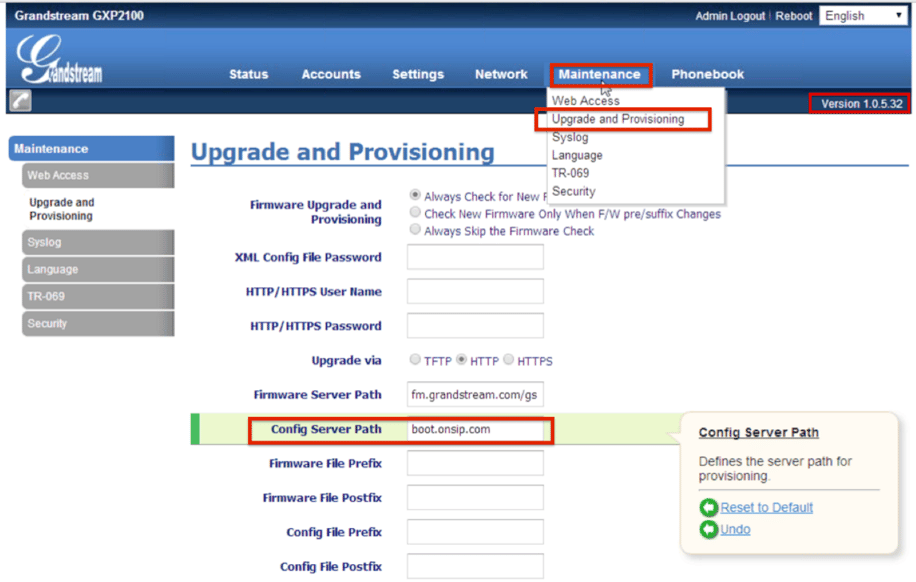
If using Grandstream GXP2100 with version 1.0.5.32 or higher firmware: Click on Maintenance > Upgrade and Provisioning and scroll down on the page until you see "Config Server Path", which is where you would add boot.onsip.com.
 |
Click "Save and Apply". Go to the main menu on the phone and choose 8 Reboot. Click reboot and the phone will read the new configuration, connect to the OnSIP server, and download the new configuration. Afterwards, your phone will automatically reboot once again before it's ready to be used.
IP Phone Booting: Improving the User Experience
IP phone booting saves users time, strengthens phone support, and formalizes the boot properties of the devices that connect to a VoIP service. Although this feature is usually overlooked, it can lead to a much smoother implementation process. If you’re in the market for a new VoIP system, be sure to ask providers if they support IP phone booting.

